How to Paint Kitchen Cabinets – Rehoboth kitchen This kitchen was done in simply white and this gorgeous custom blue on the island, the blue mirror I showed you yesterday went in this kitchen area. I am so thankful that my clients trust me and wait for me for a year or more to transform their spaces. Thank you Marlene and Manny it was a pleasure working with you on this project.
Latest kitchen commission completed last week. Two tone Little Green Intelligent Eggshell, in Inox & Lead. Totally modernised this beautiful hand built pine kitchen. New handles completed the transformation.
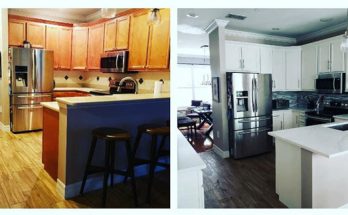
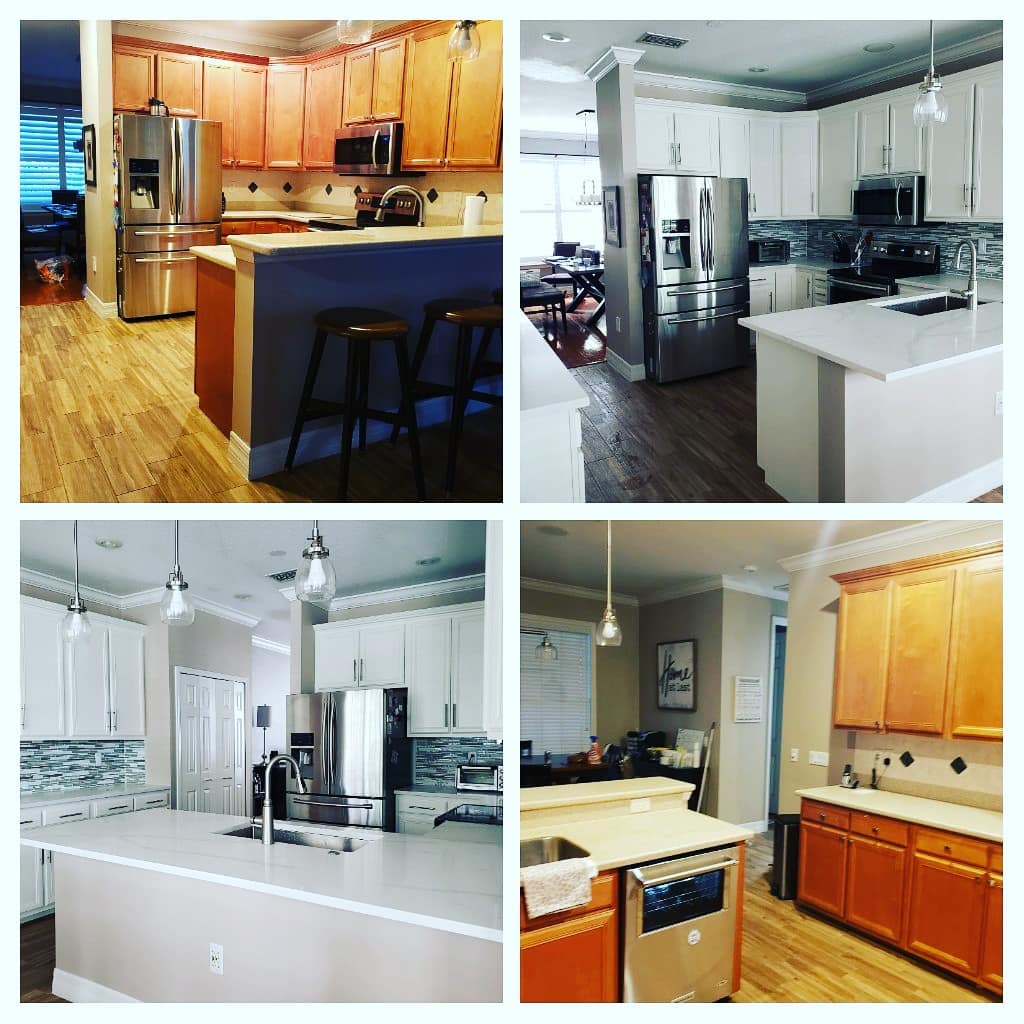
7 Ways How to Paint Kitchen Cabinets
Painting your cabinets is a great way to freshen up the look of your home! Check out this after, swipe for the before and the prep on the casings needed to ensure the highest quality!⠀
Why spend fortunes, mess and fuss on a new kitchen, if the one you have is in good condition just dated in colour… Cheshire uPVC Coating will professional respray your kitchen to a factory finish at a fraction of the cost. A touch of Art Deco. This is one of the signature patterns. Final result from my DIY Anthropology inspired kitchen cabinets remodeling. “Making-of” video is coming soon
Prepping Your Cabinet Surfaces
Remove your cabinet doors and label them. Use a screwdriver to take the doors and drawers off of the cabinet frames. Rip off a piece of painter’s tape and label it with a letter or number. Put another piece of tape with the same label on the frame where you took the door off. Label each door differently so you know where each of them goes. Put your cabinets in an open space, like a garage or basement to keep them out of the way.
- Make sure to empty out your cabinets and store the contents in another room while you’re working.
- Keep all the hardware and hinges from your cabinets in resealable plastic bags for each cabinet. That way, they won’t get lost or mixed up.
Strip old paint off the cabinets if they were previously painted. Work in a well-ventilated area with a piece of cardboard underneath you. Starting at the top of the cabinet or frame, paint a layer of paint stripper on the surface. Let the stripper sit for at least 45 minutes.
Use a plastic paint scraper to gently remove the paint in long strokes. Scrape all of your cabinets until the surface is flat and even.
- Wear thick work gloves while working with paint stripper so your skin doesn’t get irritated.
- You may need to use paint stripper multiple times if your cabinets have multiple coats.
Clean the cabinets with a degreaser. Spray a chemical degreaser on a cleaning rag or shop cloth until it’s damp. Rub your cabinets with the cloth along the grain to remove any stuck-on oil. Clean all sides of your door and frame so the primer can stick to your cabinets.
- If you’re painting kitchen cabinets, spend some extra time cleaning any cabinets that are near your cooking surfaces since they’ll have more oil and grease on them.
Smooth out any holes or dents in wood or laminate with wood filler. If you have large holes or dents that you want to hide under your paint, fill them with a synthetic wood product. Squeeze the wood filler into the spot and smooth it out with a flexible plastic scraper. Allow the wood filler to dry for a 30 minutes before moving on.
- Wood filler can be purchased at your local home improvement or hardware store.
Put down a drop cloth and tape the edges around your cabinet. Lay a sheet on the floor and countertops so you don’t spill any paint or primer on them. Once your surfaces are protected, surround the edges where your cabinet meets a wall with painter’s tape. Press the tape onto the wall firmly so paint doesn’t get underneath it.
- Wrap appliances in plastic wrap if you’re working on cabinets near them.
- Painter tape protects against paint and is easy to remove without damaging your walls.
Use a fine to medium grit sandpaper to roughen the cabinet surfaces. Find 100-grit sandpaper to remove the finish currently on your cabinets. If your cabinets are made of wood or laminate, sand with the grain so they don’t get marked up. Apply light pressure just to roughen up the surface so primer and paint adhere better. Wipe away any dust with a dry paintbrush.
- Use a sanding sponge or palm sander to get a better grip.
Paint a thin layer of bonding primer on your cabinet frames and doors. Bonding primer will hold onto any cabinet material you have. Start by painting the more detailed areas with a paintbrush before working on larger areas with a roller. Paint along with the grain to make a smooth, even surface for your paint. Cover the entire surface with the primer and let it dry completely.
- Primer doesn’t have to look perfect; it just has to cover the surface.
- Don’t use wall primer since it is meant to fill the pores in your drywall for a mechanical bond. A bonding primer holds onto your cabinets with a chemical bond.
- Remove your labels before you prime your door, but keep them close by so you don’t lose them.
- Prop your doors on small painting tripods to keep them off of your work surface source : wikihow.com